Sale Bill : To create sale bill follow the under mentioned steps : -
1. To view this form select the Pur/Billing option from the Logic Pharma.
2. Select Sale Bill from the Sale option as shown in the figure.
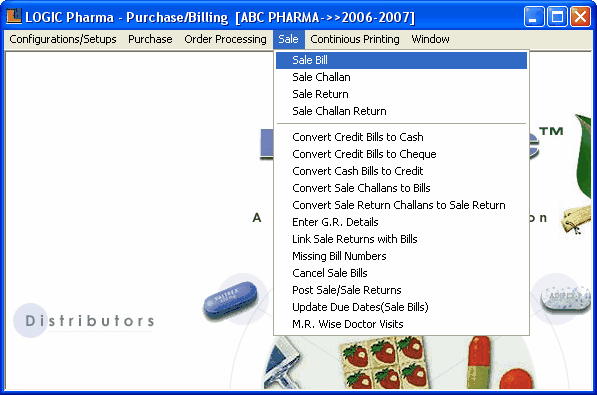
3. The Sale Bill form appears.
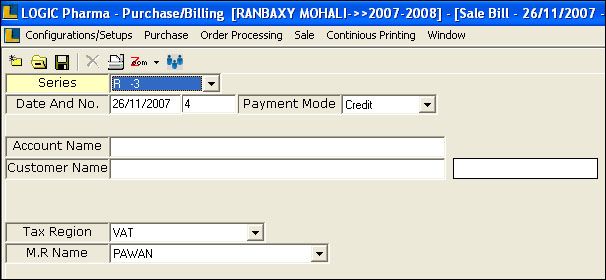
Fig 1. Sale Bill (Header Details)
3. Series,Date and Number are auto generated and press enter only.
4. Click on Item Details button or press Alt+I > new window appears.

Fig 2. Sale Bill (Item Details)
5. Enter the bar code manually then item name,pack/size,lot number,total quantity and sale rate automatically filled in the grid.
6. User can enter the C.D.(Cash Discount) if any.
7. Click on Save button or press Alt+S in order to save the bill.
8. Click on Print button or press Alt+R in order to print the bill.
•
|
Other Details Related To Sale Bill : Click the button or press Alt+O or press F9 in order to enter other details related like Special Discount(Sp CD) CD(%) and Discount in Rs (means directly deducted from the total bill).Similarly Other Details-2,3 and Sale A/c Details contain different types of details.
|
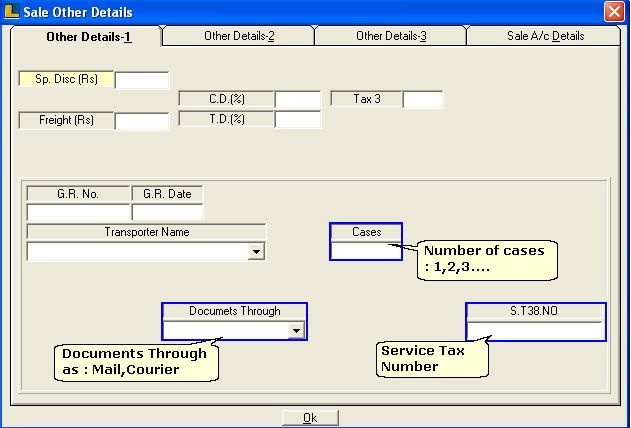
Fig 5. Sale Other Details
•
|
View Totals : Click the button or press Alt+A to view the totals of the bill.Press F2 if you want to see account wise summary of the bill.
|
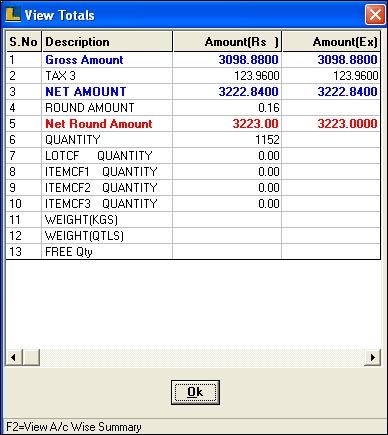
Fig 6. View Totals
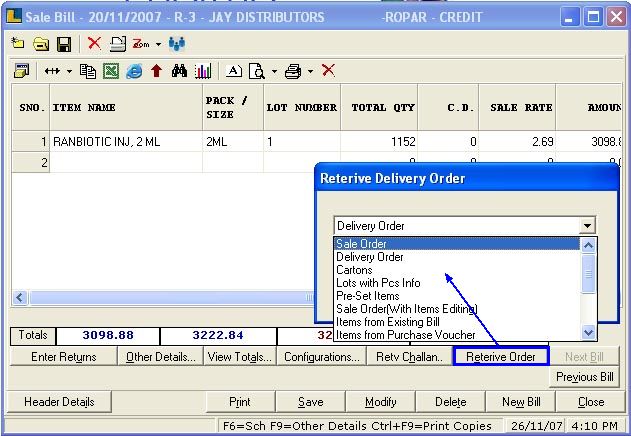
Retrieve Option : This is used to retrieve the item details which can be from sale order, sale challan or any given option.
•
|
Click the Retrieve Order button or press Alt+E.
|
•
|
Retrieve Delivery Order window appears.
|
•
|
Select the option and press Enter.
|
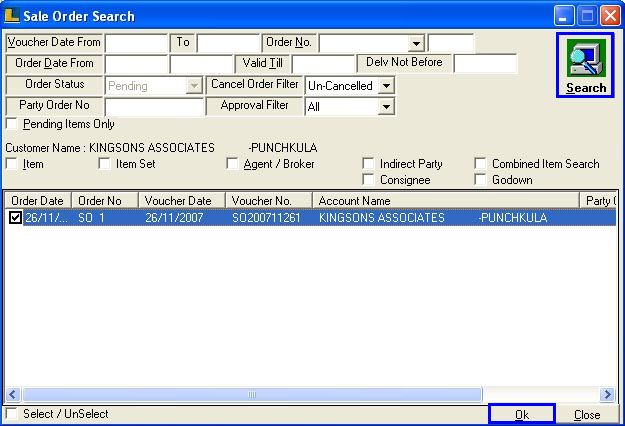
Following Sale Order Search window will appear : Click on Search button to view all sale orders and select particular as per the requirements.
Following Sale Order Item window will appear which will give details of selected sale orders as selected above.


Note : In the same way we can use the Retrieve Option in the Sale Bill,Sale Challan.
|
How To Enter Returns in Sale Bill : Used to enter the returns made by customers.
If customer wants to exchange an item do the following :-
(a) Click on Enter Returns button or press Alt+U and then enter the item to be returned.
(b) Enter the new item.
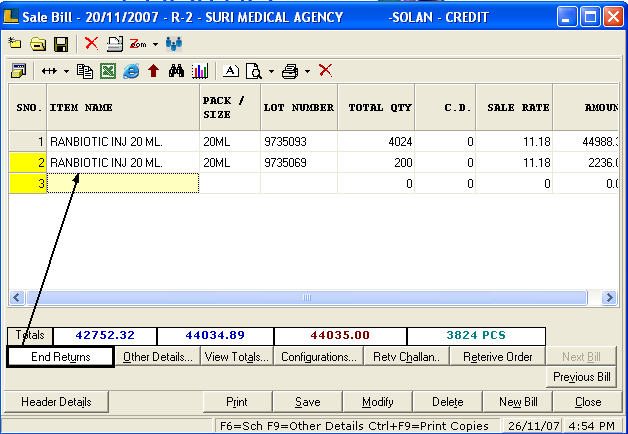
(c) Click the End Returns button in order to stop the entry of returns.
(d) If the total amount goes negative then the record is not saved or it is not allowed.
Note : When you click the Enter Returns button then the caption changes to the End Returns and color changes to white.
|