To add the Accounts to newly created Group Right , Click the mouse on the group. A small popup window will open which facilitates the user to Add Account(s) , Delete Account(s).
Contents:
Allocating Accounts To The Group:
|

|
To allocate the account, the user can select the the account name which they want to allocate to the group.
|
|
After selecting the account right click the mouse and choose the option Allocate Items/Groups.
|

Fig 1. Setup Account Groups
|
Below given pop up will come and then select the account name which you want to allocate to the group.
|

Fig 2. Allocate Groups
|
After selection of the account, the account will come under the group
|
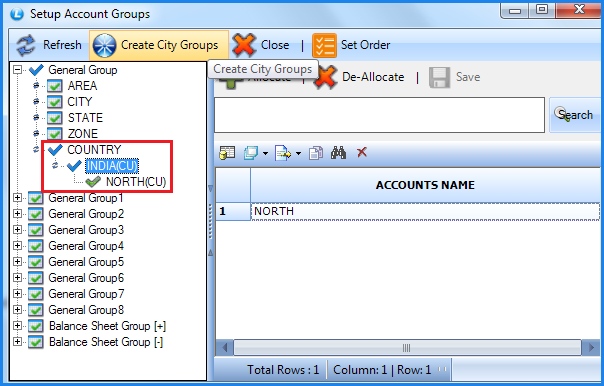
Fig 3. Setup Account Groups
|
Following is the final account group tree.
|
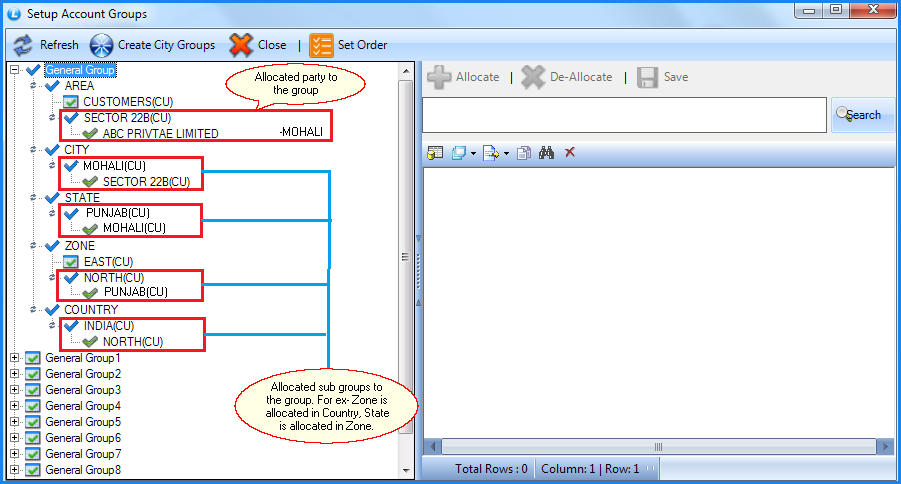
Fig 4. Setup Account Groups
Back To Top
Deallocating Accounts To The Group:
|
|
To deallocate the account, the user can select the the account name which they want to deallocate from the group.
|
|
After selecting the account right click the mouse and choose the option Deallocate Items/Groups.
|
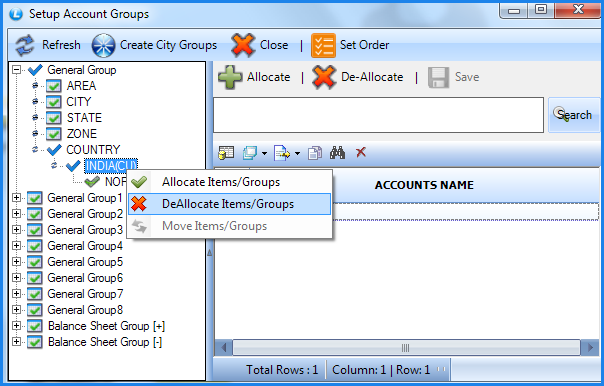
Fig 5. Setup Account Groups
|
Below given pop up will come and then select the account name which you want to deallocate from the group.
|
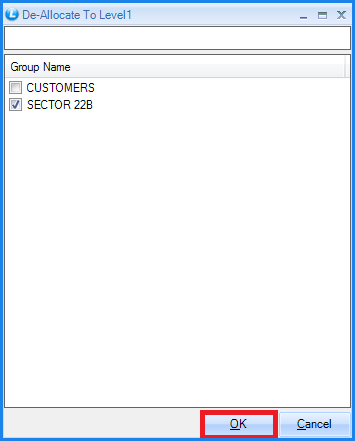
FIG 6. DE-ALLOCATE GROUPS
Back to Top
|